
A room can look beautiful and still sound harsh, hollow, or strangely loud. DIY acoustic panels offer a practical way to control those problems without covering every wall with foam. With basic tools, affordable timber, mineral wool, breathable fabric, and careful measurements, homeowners can improve speech clarity, music detail, and everyday comfort.
Acoustics expert F. Alton Everest described the principle clearly: “The room is an instrument.” That idea guides every successful DIY acoustic panels project. Panel thickness, air space, placement, and room size all affect performance. A 10-centimeter panel with a small gap behind it can absorb low-mid reflections more effectively than a thin panel fixed directly to drywall. Placement matters.
Test before cutting.
This guide explains how to plan, build, mount, and evaluate panels for bedrooms, offices, studios, and living rooms. It also addresses fire-conscious material choices, stable frames, fabric breathability, and secure wall attachment. These details are easy to overlook. They should not be.
A simple clap test can reveal flutter echoes, but it cannot replace measured results. Smartphone apps may help identify patterns, although their microphones and rooms create limitations. Expect some trial and error. My own design preference would not suit every room, and that is worth admitting. Start with listening, make one change at a time, and judge the result from your normal seating position. Good treatment should make a room calmer, not completely lifeless.
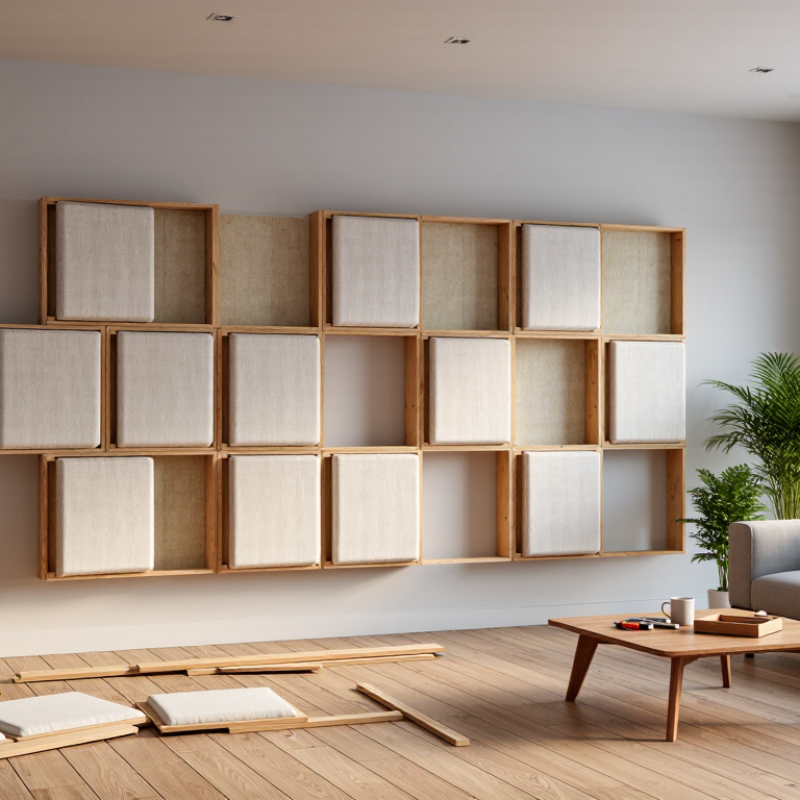
Acoustic panels are porous surfaces that absorb reflected sound inside a room. They reduce echoes, harshness, and lingering speech noise. They do not block sound from entering or leaving. That distinction prevents expensive disappointment.
A useful panel usually has an absorbent core, breathable fabric, and a small air gap behind it. Dense, sealed materials can reflect sound instead of absorbing it.
Plan placement around reflection paths, not empty wall space. Sit where you normally listen or speak. Ask someone to move a mirror along the side wall. When you see the speaker, mark that point for a panel. Repeat this test on the opposite wall and ceiling, if practical.
Place panels behind speakers and behind the main listening position when the room sounds lively. Leave some wall area uncovered. Too much absorption can make speech feel dull and strangely flat.
Measure the room before cutting materials. A 60-by-120-centimeter panel is manageable for many spaces, but dimensions should match your walls. Keep panels away from heaters, vents, and damp corners. Mount them securely, especially above desks or seating.
I once covered one wall too heavily and removed several panels later. The room became clearer, but not lifeless.
Use a hand clap, a short voice recording, and careful listening after each change. Small adjustments often reveal more than a perfect-looking layout.
Choose porous materials before decorative details. Fiberglass or mineral wool, 40–60 kg/m³, absorbs more sound than thin foam. Use breathable fabric, a rigid frame, screws, corner brackets, gloves, and eye protection.
Start with panels around 600 by 1200 millimeters. A 75–100-millimeter thickness usually performs better than a 25-millimeter panel, especially below 500 hertz. Leave a 50–100-millimeter air gap behind each panel. That gap increases effective depth. It also improves low-frequency absorption. Professional test reports under ASTM C423 calculate the Noise Reduction Coefficient from absorption values at 250, 500, 1,000, and 2,000 hertz. Avoid treating NRC as a complete room measurement. It misses some bass behavior. ANSI/ASA S12.60 uses a 0.6-second reverberation target for many classrooms, but home studios and living rooms need personal testing.
Tips: Clap near the room’s center, then listen for a sharp ring. Place panels at first-reflection points, usually beside the listening position and above the desk. Use a mirror to locate them. Cover corners with thicker bass traps when possible. Do not compress the insulation tightly. I once made panels too shallow and noticed clearer voices, but almost no bass improvement. That mistake remains useful: measure before cutting. A phone app can estimate reverberation time, though it is not laboratory equipment. Leave ventilation clear, and inspect the fabric after installation.
| Panel Type | Recommended Dimensions | Absorber Material | Material Thickness | Best Use | Estimated Absorption Range |
|---|---|---|---|---|---|
| Compact Wall Panel | 24 × 48 in (61 × 122 cm) |
Semi-rigid mineral wool or fiberglass board | 2 in (5 cm) | Bedrooms, offices, small studios | Primarily mid and high frequencies |
| Standard Broadband Panel | 24 × 48 in (61 × 122 cm) |
Semi-rigid mineral wool or fiberglass board | 4 in (10 cm) | Home theaters, music rooms, recording spaces | Mid to upper-bass and mid frequencies |
| Large Ceiling Cloud | 24 × 72 in (61 × 183 cm) |
Lightweight mineral wool or fiberglass board | 2–4 in (5–10 cm) | Reducing ceiling reflections and flutter echo | Broad mid and high-frequency control |
| Corner Bass Trap | 12–24 in face width (30–61 cm) |
厚, porous mineral wool or fiberglass; stacked or straddled in corners | At least 4 in (10 cm), preferably deeper | Controlling room modes and low-frequency buildup | Improved low and low-mid absorption |
| Portable Freestanding Panel | 24 × 72 in (61 × 183 cm) |
Semi-rigid mineral wool or fiberglass board | 4 in (10 cm) | Flexible recording, rehearsal, or speech areas | Broadband absorption on both exposed sides |
| Item | Suggested Specification | Purpose | Typical Quantity for One 24 × 48 in Panel |
|---|---|---|---|
| Absorber board | Rigid or semi-rigid porous board, 2–4 in thick | Converts sound energy into a small amount of heat | One 24 × 48 in piece |
| Frame lumber | Straight boards sized to create the selected outer dimensions | Supports and protects the absorber | Two long rails and two short rails |
| Acoustically transparent fabric | Breathable woven fabric that allows air to pass through | Covers the panel without blocking sound absorption | Approximately 34 × 58 in, allowing folding and stapling |
| Backing material | Thin breathable fabric or open backing | Keeps loose fibers contained while preserving airflow | One piece slightly larger than the frame |
| Fasteners | Wood screws, corner brackets, or appropriate wall anchors | Joins the frame and secures it to the wall | 8–12 screws plus suitable anchors |
| Basic tools | Tape measure, square, pencil, saw, drill, scissors, and staple gun | Measuring, cutting, assembling, and upholstering | One set |
| Personal protective equipment | Gloves, eye protection, and a suitable dust mask or respirator | Reduces exposure to dust and fibers during cutting | One set per person |
| Guideline | Recommended Value | Why It Matters |
|---|---|---|
| Air gap behind a wall panel | 2–4 in (5–10 cm) | Increases effective low-frequency absorption compared with mounting directly on the wall |
| Initial wall coverage | Approximately 15–25% of the wall or ceiling area | Provides noticeable reflection control while retaining some natural liveliness |
| First-reflection locations | Side walls, ceiling above the listening area, and the wall behind speakers | Reduces early reflections that can blur speech and stereo imaging |
| Panel spacing | Leave at least 1–2 in (2.5–5 cm) between separate panels | Makes positioning easier and maintains a balanced visual layout |
| Fabric test | You should be able to blow air through the fabric | Confirms that the covering is unlikely to significantly restrict sound entry |
| Panel safety | Use secure anchors and avoid covering vents, heaters, or electrical fixtures | Prevents falling panels and reduces ventilation or heat-related risks |
Note: Acoustic panels reduce reflections and reverberation; they do not provide soundproofing or stop sound transmission through walls.
Build a rigid frame from straight, kiln-dried timber. A depth of 100 to 150 millimeters improves low-mid frequency absorption. Wider panels also cover more reflective wall area.
Cut two long rails and two short rails accurately. Check each corner with a carpenter’s square. My first frame was slightly twisted, and the fabric exposed the error immediately. Pre-drill the joints, then use screws instead of relying only on glue. Add a center brace for panels wider than 600 millimeters. Sand sharp edges before wrapping the frame.
Choose a porous core, such as mineral wool or polyester fiber, with a suitable density. Do not compress it tightly. Air gaps behind the panel can improve absorption, especially at lower frequencies. A 50-millimeter gap is practical in many rooms.
ASTM C423 test reports use the Noise Reduction Coefficient, or NRC, for comparison. An NRC of 0.80 is useful, but it is not a guaranteed room result. Measurements usually cover 250, 500, 1,000, and 2,000 hertz. ISO 354 provides the laboratory method behind many absorption data sheets.
Wrap the core with breathable fabric, then staple the rear side evenly. Test airflow through the fabric first. If you cannot breathe through it, sound may struggle too.
The 2023 ASHRAE Handbook emphasizes controlling reflections through absorptive surfaces and room treatment. Leave small gaps between panels rather than covering every wall. That balance is easy to miss.
Hang panels securely, especially above desks or seating areas. Consider professional testing if speech clarity remains poor.
Acoustic panels reduce echoes by absorbing reflected sound, but they do not soundproof a room. Measure each wall before buying materials. A simple timber frame, dense acoustic insulation, breathable fabric, and mounting hardware are enough. Leave the insulation uncovered only during assembly, and wear gloves and eye protection when cutting it.
Cut the frame pieces square, then join them with screws and corner brackets. Fit the insulation snugly inside without crushing it. Stretch the fabric across the front, pull it evenly over the back, and staple it every few inches. Fold the corners like wrapping a present. Keep the fabric tight, but do not overpull it. My first attempt had a loose edge and one visible wrinkle. I removed the staples and tried again.
Mount the finished panel with sturdy brackets or a simple cleat system. Use wall anchors suited to the wall material, and locate studs when possible. Leave a small air gap behind each panel; this can improve low-frequency absorption. Place panels at ear height near strong reflection points, such as side walls beside the listening position. Add ceiling panels if voices still sound sharp. Test the room by clapping or recording speech from the same spot. Move one panel at a time. The best layout may differ from the original plan.
Typical sound-absorption performance of a 50 mm porous DIY acoustic panel across standard octave-band frequencies. Absorption generally improves at mid and high frequencies, while a 50–100 mm air gap behind the panel can improve low-frequency performance.
DIY acoustic panels can improve a room, but their position matters as much as their materials. Before mounting anything, test the room with your ears and a simple recording. Stand in the center and clap once. Listen for a sharp flutter or a lingering metallic echo. Then speak while walking around the room. Notice where your voice becomes thin, harsh, or unusually loud.
I also use a phone recording from the listening position. It is not laboratory equipment, but it reveals uneven reflections. My first panel layout was wrong. I placed too many panels behind the desk and ignored the side walls. The room sounded dull, yet speech remained unclear. That mistake taught me to change one position at a time.
Start with the first reflection points beside the listening area. A helper can hold a small mirror against the wall. When you see the speakers from your seat, mark that location. Mount panels there at ear height, leaving a small air gap behind them. Test the room again after each adjustment. Move a panel several inches if reflections still feel strong.
Do not cover every hard surface. Some natural sound is useful. If low notes still build in corners, add thicker treatment there, but check the result with familiar music and spoken words. Keep short notes about each arrangement. Rooms respond differently, and your first “perfect” setup may need another honest review.